To exercise this play a joke on you'll need the following
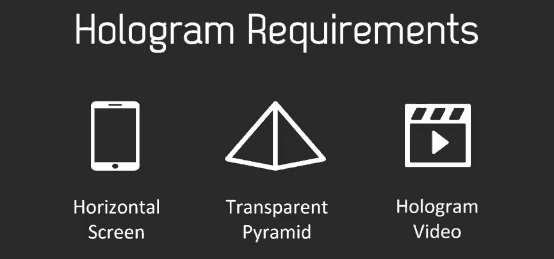
What y'all need to make a hologram
Horizontal screen
First, you volition need a screen that you lot tin lay flat on your tabular array. This can be a phone, a tablet, or a figurer screen (which is what I used) – or some people have even flipped their TVs on the back to become some pretty behemothic projections. Of course, the larger the screen, the bigger the outcome, so I would recommend going as large as you can.
Transparent pyramid
Next, you'll need a transparent pyramid. In that location are tons of tutorials on YouTube for how to make this yourself, super cheap, out of a CD case and some tape, such as this one. Or if you lot're lazy like me, you can become it Amazon, such equally the one I got here (combo pack for cell phone and table). Just make sure you get (or brand) it in the size that fits the screen y'all'll be using. This will sit on top of your screen (more on that later).
Hologram video
Finally, you'll demand a video to project. Yous tin detect a lot of these already fabricated on YouTube, similar the ones I showed in the example to a higher place. Pretty much all of these videos have four panels, which you can run across from all iv sides of the pyramid. These are peachy for getting started with this trick and astonishing your audiences right away. To spice it upwards more by adding your face, nonetheless, bank check out how to practice information technology beneath.
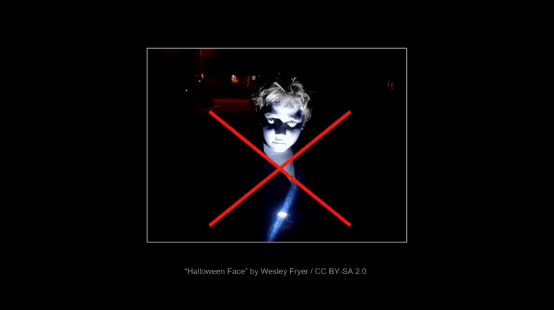
A dark turtleneck (preferably black)
Preferably black. You lot could also get abroad with having a dark shirt and a dark scarf. The near of import thing is that your neck is dark so that you don't encounter it.
A nighttime sheet or background (preferably blackness)
You tin hang the sail behind you lot or you lot can even sit under it, which is what I did since I didn't feel similar hanging it.
For the lighting, you lot have to get a light source either pointing towards your face or away from your face for a more than natural wait (it volition reflect on your face more softly). Play around with the light until you similar it. Y'all definitely don't want to have that scary flashlight face up going on – unless of class it's Halloween, which could actually be very fitting.
Creating the hologram
Then go ahead and get filming. I personally but use my phone to film, then you don't really need very fancy equipment.
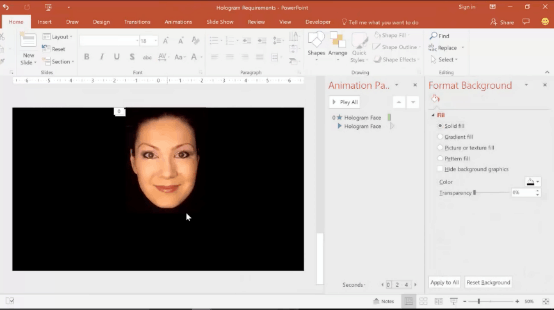
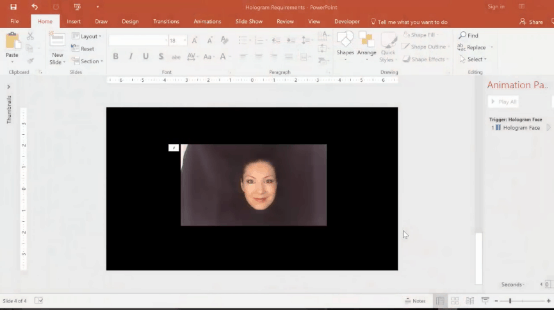
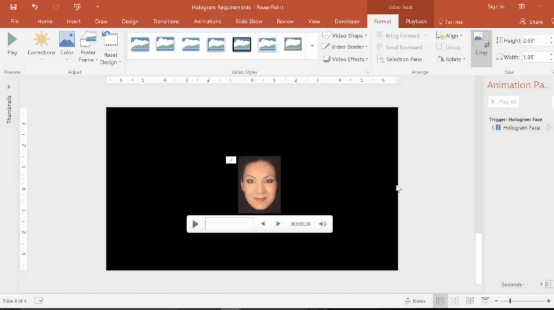
Once you're done filming, insert the video into PowerPoint (or a video editor), and you should have something like this. Not perfectly black, only very close and we can definitely piece of work with it.
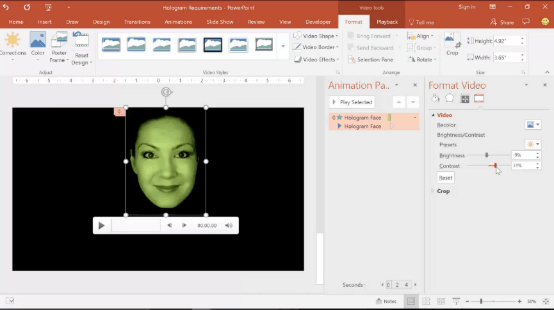
In one case we accept our video inserted, the first thing we need to practise is simply crop around the confront and then that we don't have any of that actress video infinite to piece of work with. So let's select the face up video and and so go to Format and then Crop.
So but crop around the face up. Make information technology as tight as possible without cutting into the face up.
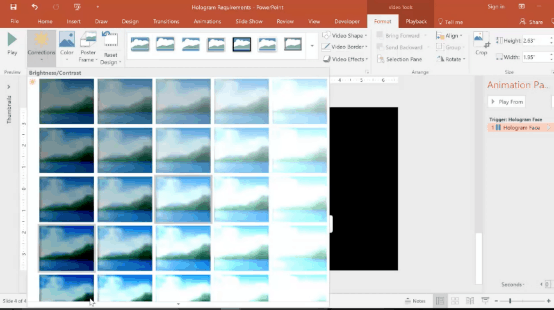
Now what this also does is it shows us the edge of the video, which is what we're going to have to blend in with the black of the groundwork. So we do this by changing the brightness and contrast settings.
To do this, get to Format and then Corrections. Then whorl all the way down to video corrections options using the arrow on the bottom of the carte.
Nosotros so play around with the brightness and contrast until the video groundwork around the confront turns completely blackness. Nosotros tin fifty-fifty zoom in here and so that nosotros can see improve.
For brightness, I'll lower it downwards to -5%, percent, for case. Then, permit's make the contrast about 19 or 20%. Of grade, this is all going to vary for your video, so but play around with these settings until you find something that works for you.
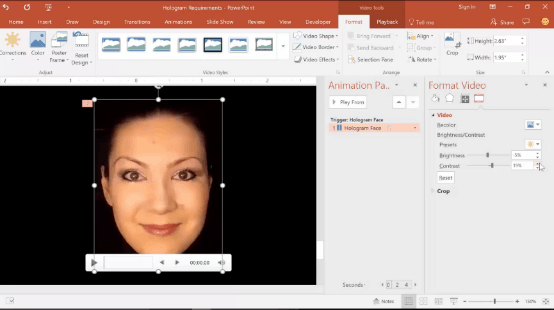
Let's at present deselect the video (by clicking anywhere else) – and looks similar we have our video edges perfectly composite with the background, which is smashing.
Let's zoom out, then we'll brand iv different copies of the video so yous can see them on ea
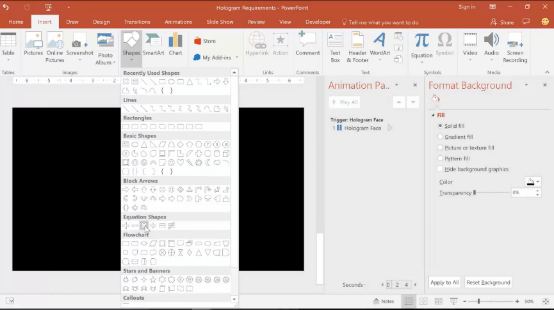
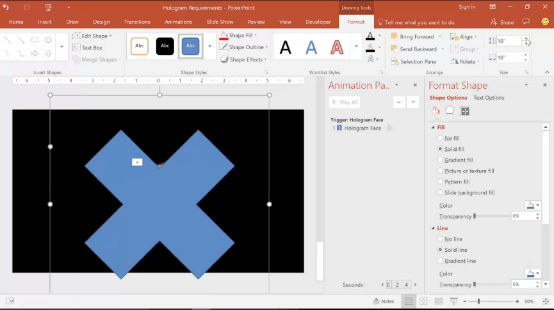
ch side of the pyramid. To do this, we will first need a guide – then nosotros go to Insert and Shapes, and and then under Equations Shapes, click on the multiple sign or the X here.
Go ahead and describe that in nice and big. Let's put it in the middle of the slide and just make sure that it's foursquare. So we'll but need to even this out. Let's brand information technology 10 ten x on the size settings.
At present nosotros know that this is perfectly square. Adjacent we need to brand it a footling chip skinnier by taking the yellowish dot that'southward on the X, and adjusting it and so it becomes much skinnier.
Then finally, we put it in the middle of the screen by going to Marshal and then Center. Going to Align once again, and choosing Middle. The X should be in the middle of the slide now, and the infinite is divided into four carve up panels that we can work with.
Your concluding result should expect like the below:
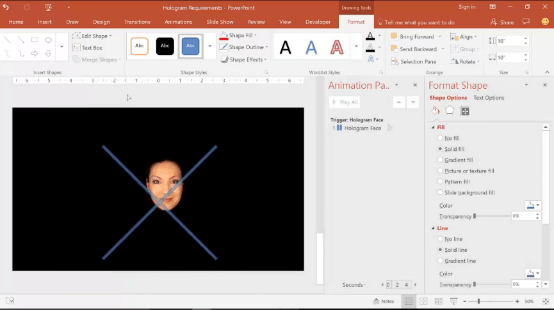
Now, just send the X to the dorsum by right clicking on it and choosing Send to Dorsum. We can so place this video in the starting time panel. When you're placing the video, brand sure yous take the office that volition exist facing the bottom pointing to the heart of the X (in my case, my chin).
It'south OK if the edges of the video are touching the X, as we're actually going to delete the X very shortly anyway.
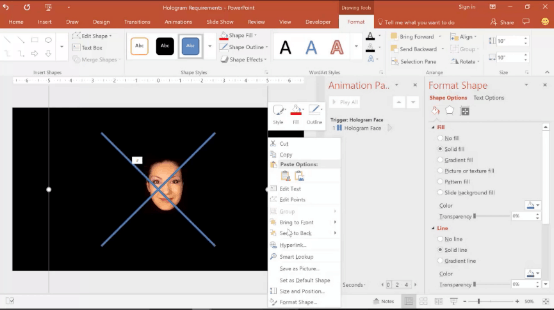
Side by side, nosotros're going to make three different copies of the video (hit CTRL + D three times with the video selected) and identify them so they're all facing with the chin inward. Employ the rotation adjuster to rotate them – or yous tin also use the rotation settings to make this exact. Hither's what the consequence looks like – doesn't have to be perfect, but the X lets you lot get it close plenty.
Now that we've used the Ten to line everything upwardly, we tin can go ahead and delete information technology.
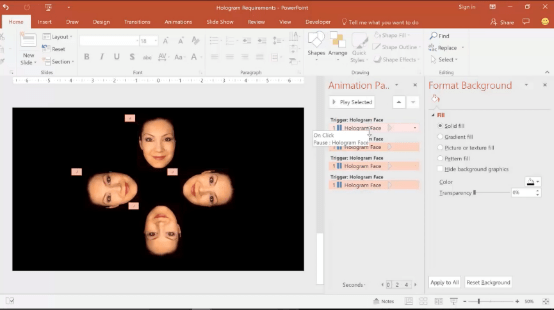
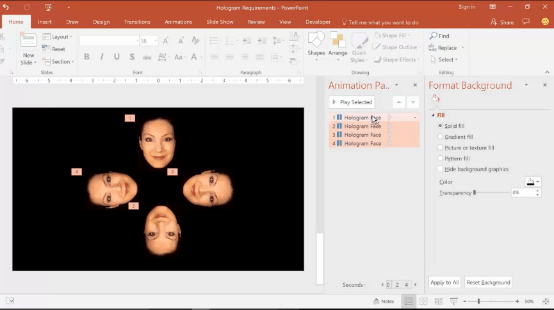
Next, we need to sync upward all of the videos then that they tin can start at the same time. To exercise this, we select all the videos by clicking on all of them in the Animation Pane on the correct while holding downwards the SHIFT key.
Nosotros and so accept out all of the triggers by clicking on the selected videos on the Animation Pane, then dragging upward (moving your cursor up slightly) and releasing. The triggers are now removed.
Make all the videos Commencement With Previous (or Start on Click) in the Elapsing and then Play instead of Pause (which was the default).
Y'all are basically done – very prissy! You're gear up to relish equally is, if y'all like. However, I propose you keep reading for some additional avant-garde tips to add even more spice.
Pro Tip #ane: Adding animations
First, consider whether you lot want your face to accept an Entrance effect. For instance, for my introduction video, I had the face up come in with a Zoom entrance effect. Put whatever entrance effects (or emphasis or exit effects) you like on all the videos, by selecting them, then going to Add Animation and adding what you desire.
Here is what my blitheness pane looked like after I added the Zoom entrance. Detect how the first video has a first After Previous result, and the others have a first With Previous effect.

Pro Tip #2: Improving sound and video playback
If your videos have sound, mute all of them except ane – otherwise, information technology will audio similar a chorus of voices, since PowerPoint can't handle syncing all four videos at once.
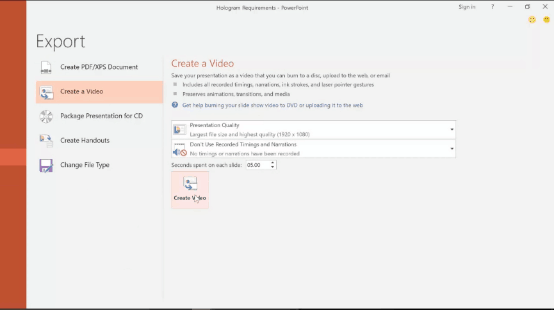
To improve the video playback (i.e., making sure the videos play together), I suggest exporting the set up of 4 videos to a new video – so reinserting it back into PowerPoint. This will ensure everything is synced properly. You can do this by going up to File, then Consign, so Create a video. After this, detect the file and drag it dorsum into PowerPoint.
Pro Tip #3: Maximizing video size
Here's a tip that I haven't heard anybody talk well-nigh yet in whatsoever of the tutorials I've seen – maximize the size of your video within the pyramid by using only 1 video instead of four.
The four-console video is groovy if you're actually going to exist using this with an audience that will exist looking at it from all sides.
However, in a situation in which there's only one side that'due south going to be seen, I personally like to maximize the size of the video so that the audience can run into the largest possible image. That is what I did for the intro to this video.
What I did there is simply made the head a scrap larger. Same procedure – you just don't need the X. Go on increasing the size and testing information technology with your screen to brand sure the head isn't also big for the pyramid. Mine ended up existence the size below – so a flake larger than it was in the four-panel video.
Pro Tip #4: Making your face colorful
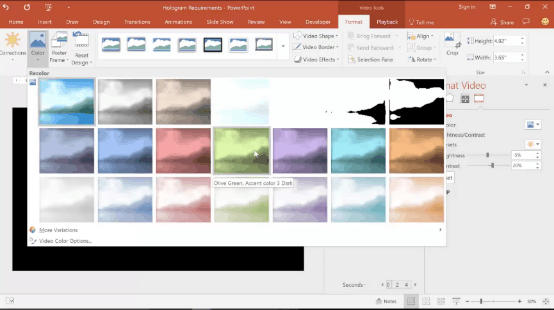
If y'all desire to look really creepy or like an alien or witch, for instance, y'all can actually modify the color of your face to be a little scrap more than interesting. To do that, we select
the face and so nosotros get to Format, and so Color, and if I want to make myself green, I click on the green and black option hither.
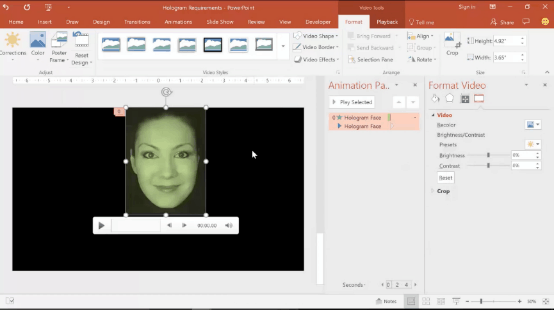
Looks practiced already, but now I have to readjust the brightness of dissimilarity settings to brand the video groundwork blackness. Making it light-green messed up our settings from final time. Let me just practice less brightness (-9%) and more dissimilarity (34%), so the face looks something like the beneath. Once again, the primal hither is to make sure the black part of the video matches the black of the slide.
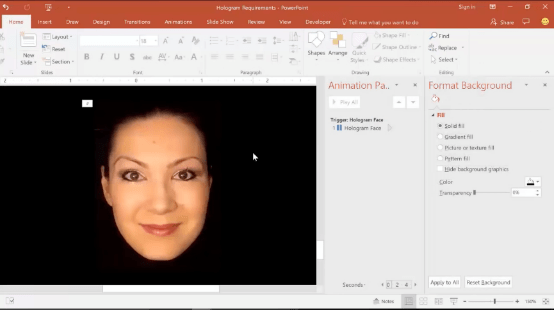
Perfect – a bit more interesting than only my regular face (maybe I should have used this for the intro video, but I didn't desire to scare anyone away!).
Final hologram video steps
Now that you're washed with the hologram video (in whatever way yous decided to make information technology), you tin now add the pyramid on top and project. Brand sure you screen is horizontal (computer screen, tablet, phone, TV, etc.) and then place your pyramid on meridian of it.
If y'all have a 4-panel video, put the pyramid right in the middle (where the center of the X used to be). If you have a i-console video, put the pyramid right underneath it (under the chin, in my case) – test it out and adjust as needed to make sure it'southward in the right place. You can also change the click settings to make it start on click or With Previous like what I showed earlier.
Great, that's it! Go out and attempt this. In addition to the 3D "hologram selfie" trick, you can also do this with any other video, movie or even text likewise. You tin can also use any pre-made videos on YouTube – merely search for "hologram pyramid video."
Hologram usage tips
You may exist wondering – this is super cool, only how could I actually use it in presentations?
There are many ways.
First, brand certain you have a computer or tablet available that can be used as a horizontal projector. This is the most practical projector for a small classroom-type presentation.
Let's say you're teaching a class on birds or sea creatures of some kind, for example, you could play one of the ocean creature videos (like the popular jellyfish one you lot can get on YouTube) at a primal moment in your presentation. You can fifty-fifty walk around with it through the audience so that they can meet it improve. Just make certain to concord it above their eye level for best results.
Equally another example, maybe you accept a station at a poster session or scientific discipline off-white. You could have some version of this play tricks playing – maybe a production demo, a "hologram selfie" of the CEO talking most your company – or even a static photo or logo to attract people to your station.
Being spicy is all about standing out from others – and this event should exist cool and different enough to exercise and then. I hope this has give yous some new ideas and inspiration.
Shoot me a note if you lot can call up of other cool uses for this trick or whatsoever other emerging presentation technology that you think might be worth featuring in a time to come tutorial. I'd dearest to hear your thoughts.
As well, if you lot desire to encounter this tutorial in video form, click hither.


Comments
Post a Comment